Now coming to you from the Land of Enchantment!
August 27, 2016

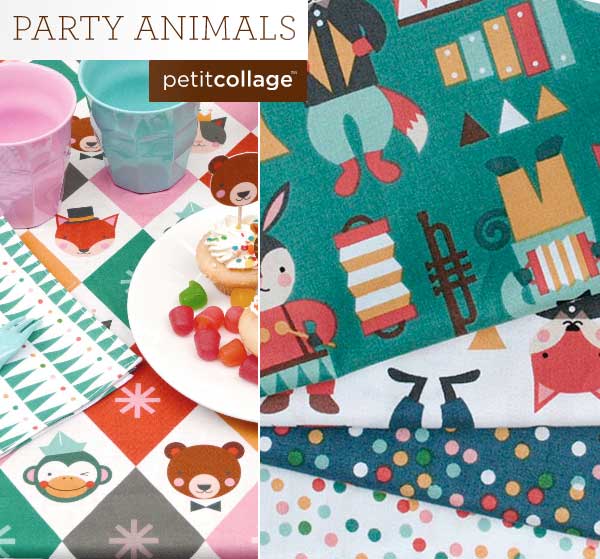
Vintage animal prints with a modern twist. Printed on 100% organic cotton, this festive collection by Petit Collage is sure to get you in the party spirit. Great for use in children’s quilts, bedding and decor, and for youth apparel, get the party started with Party Animals!

I've been wanting to make the Esme Top for a while, and when Wildwood arrived in the shop last month some of the prints seemed very fitting. This was my first experience with Sew Liberated patterns. I consider myself a beginner when it comes to apparel making (quilter here!), and I found the video walk-throughs extremely helpful. Video tutorials are available with the purchase of all Sew Liberated patterns. The patterns also include detailed written instructions so that an experienced sewist can move on without watching the video.
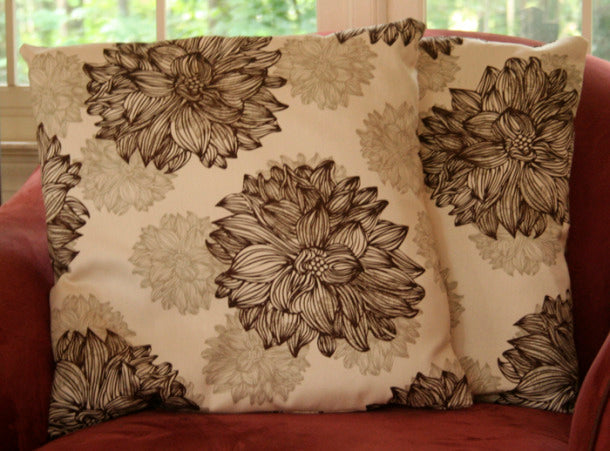
Give sofa pillows new life with a bit of fresh organic fabric and a minimal amount of time at the sewing machine. No buttons, no zippers, no fuss!
The pillows shown are 20" square but you can modify the below instructions to fit the size you need (see bottom of post). We used a 7oz twill fabric by Harmony Art. Any quality medium-weight muslin or home dec fabric will do.
20" Square Pillow Covers with Envelope Closure
Materials Needed
Assembly Instructions
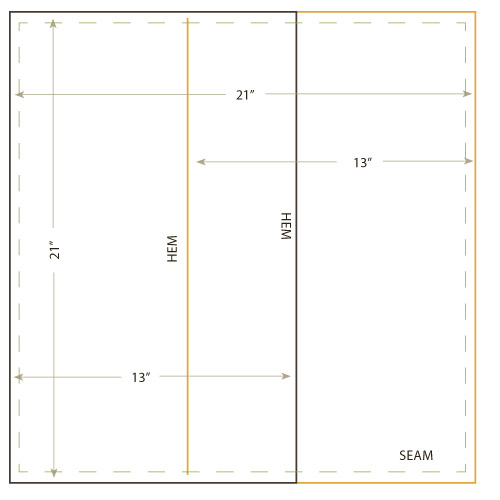
Assemby Diagram
Size Modifications
You can adjust these directions to cover just about any pillow. Allow enough fabric for a 1/2" seam allowance, so if you're making an 18" square cover, you'll need 19" wide fabric. Adjust the height of the smaller pieces accordingly. You will want the finished pieces to overlap about 4"
This summer I'm not feeling very motivated to start a big quilt project. The combination of Georgia heat and quilt batting just isn't very appealing to me. But the drive to create things hasn't abated - not one tiny bit!
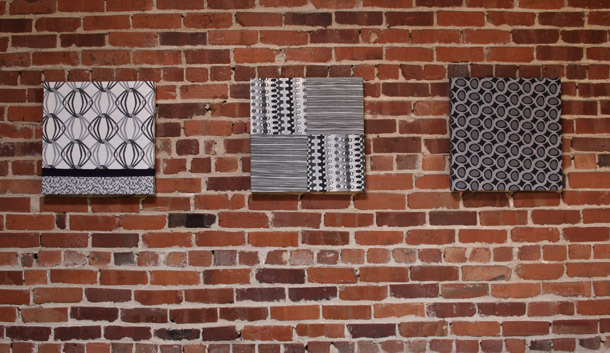
Our shop is located in an old cotton warehouse at the renovated Porterdale Cotton Mill. The walls are wonderfully rustic brick, 16 feet high, punctuated by the original longleaf pine1 pillars and beams. We adore this space and the tiny town of Porterdale, replete with it's unattended library and honor-system book borrowing. But what to do with the walls?
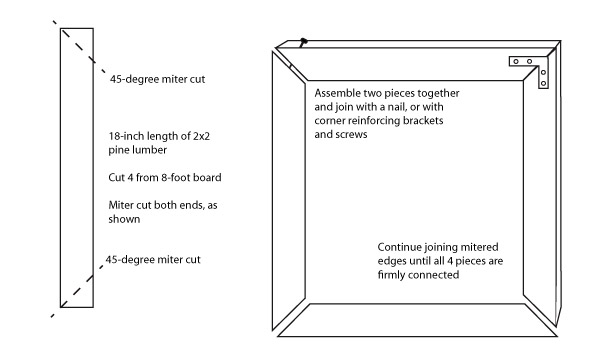
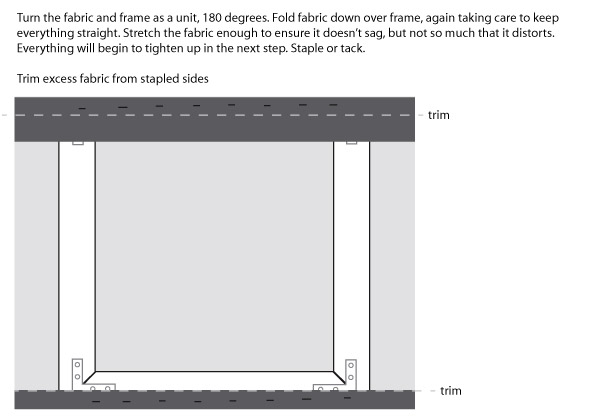
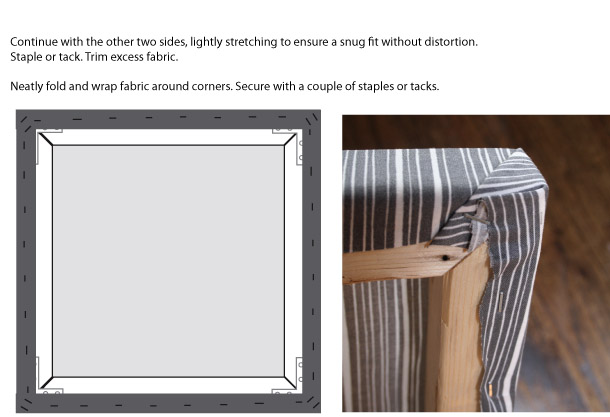
The answer came in the form of a few pieces of 2x2x8 pine lumber from the local hardware store and a couple of yards of fabric. In an afternoon we had three 18" square 'works of art' ready to adorn the walls. This project is wonderfully simple -
For one frame, you will need:
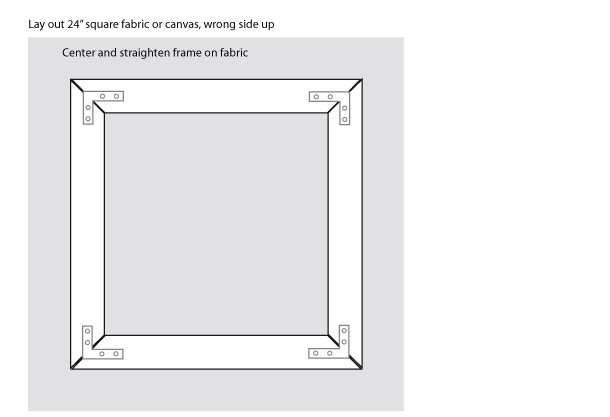
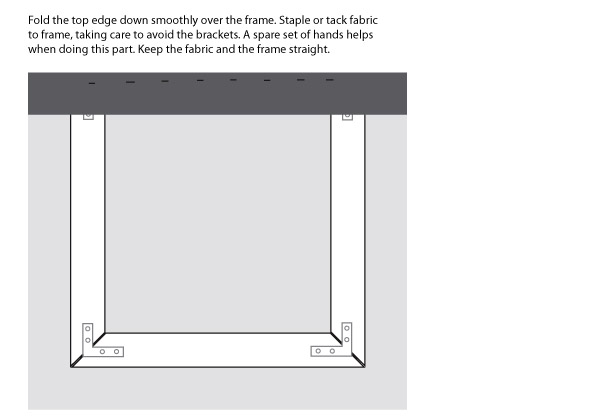
Assembly:
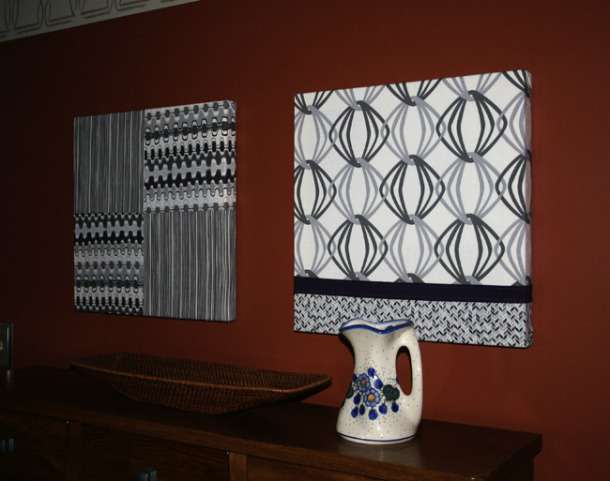
Et, voila! I hung two in our dining room before bringing them to the shop. Not too shabby, eh?
Whatever you choose to do this weekend, Enjoy!
1 Longleaf pine is a slow-growing, hardwood pine native to the southeast USA. It was a very popular building timber as it is hard wood and long lasting (the beams in this building are over 100 years old). The large-scale timber industry here in the south between 1880 - 1920 devasted the longleaf pine forests. Today they are among the most endangered ecosystems in North America. There are a few virgin stands that remain. I've not visited yet, but understand they are unlike any other ecosystem. If you're interested in learning more this is a good place to start